
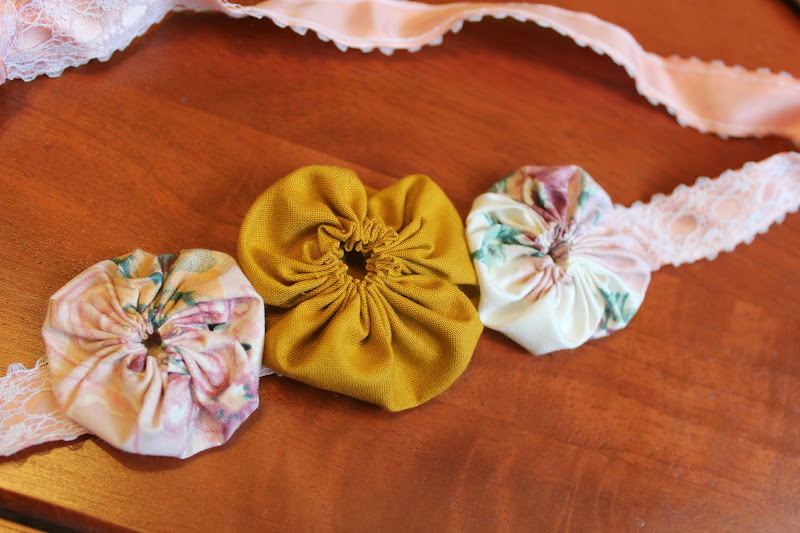
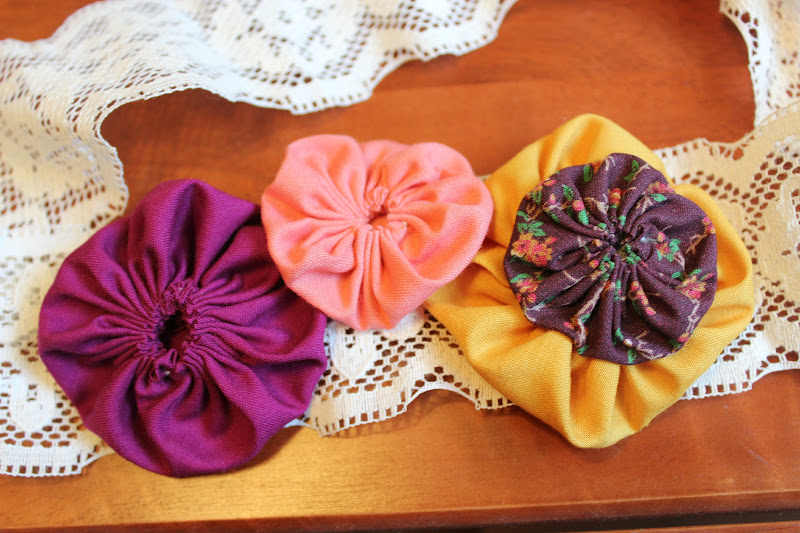
DIY Yo Yo Headband


When I was a little girl, my friends and I had a club we called The American Girl's Club. We met weekly and planned all kinds of events and parties (most of which sadly fell through), and even had a tin Garfield jar that housed our spare change dues. We later lost the jar, though I still have my theories that our treasurer ran off with it (just kidding, Whitney!). Anyway, one of our favorite things to make were yo yos. Almost all of our grandmothers sewed and passed along fabric to us, so we put it to good use making these little cuties.
When (the now famous) Nana recently gave me a ton of fabric scraps, I knew I needed to make some yo yos for old time's sake. I can't stop now! They're very easy and once you get going, it's hard to find a stopping point. Hope this tutorial helps any of you that want to whip some up!
You will need: scissors, needle and thread, fabric scraps, and your choice of headband material (I used lace trim and stretchy headbands from Dollar Tree)

Cut your fabric into a circle about twice as big as your intended yo yo. You can use a drinking glass or bowl to trace, or just eyeball it like I lazily do (still works fine!).

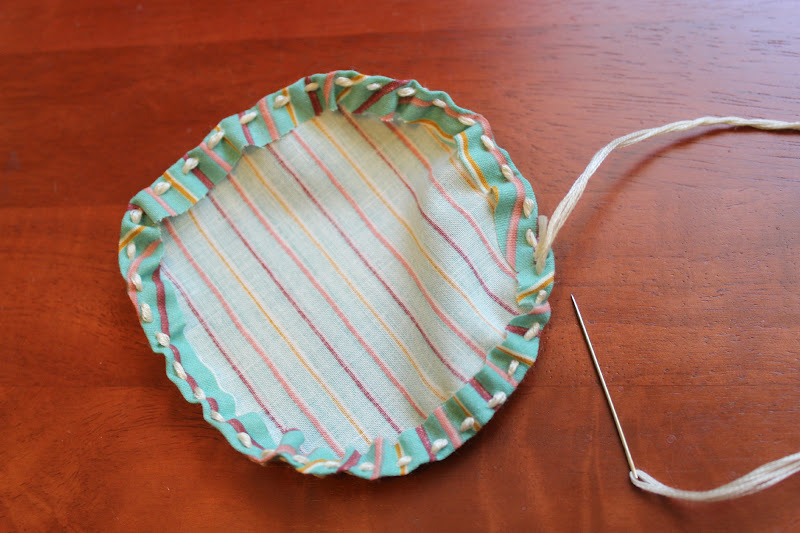
Fold under a scant 1/4" along the edge of your circle.

Start stitching from the inside as to hide your knot, and stay close to the folded edge. Use strong thread and make sure it's long enough to go around the full circumference of the circle.


Stitch around the entire circle until you're back to where you started.
Gently pull your stitching thread until the edges gather to the center.
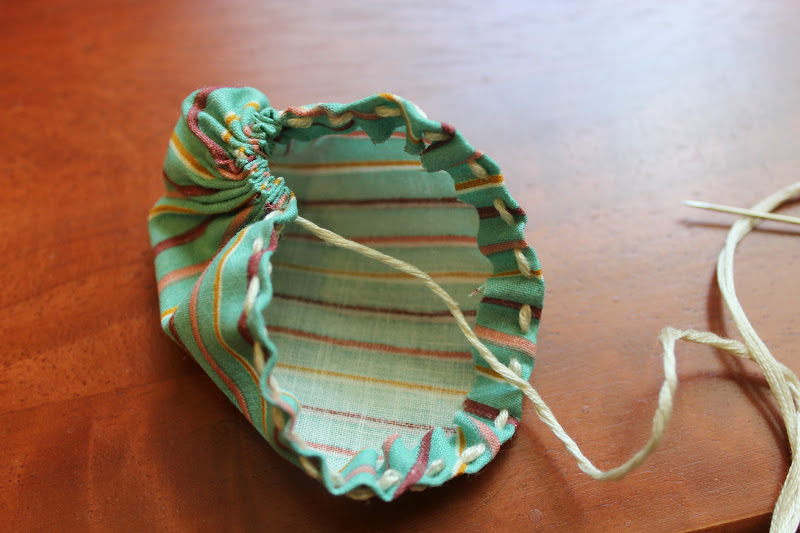
Make sure to flatten your yo yo out as you pull.

Once it's nice and tight, poke your needle through the hole and out the back side of the yo yo.

Cut the thread and secure a knot.
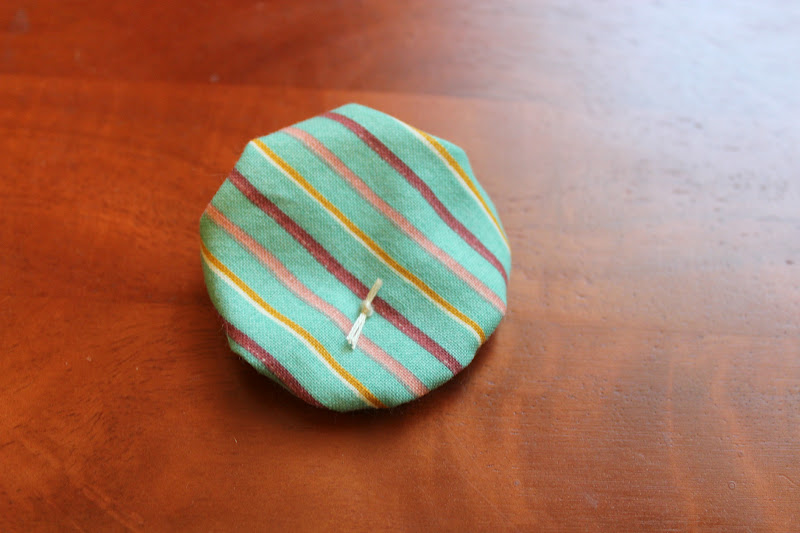
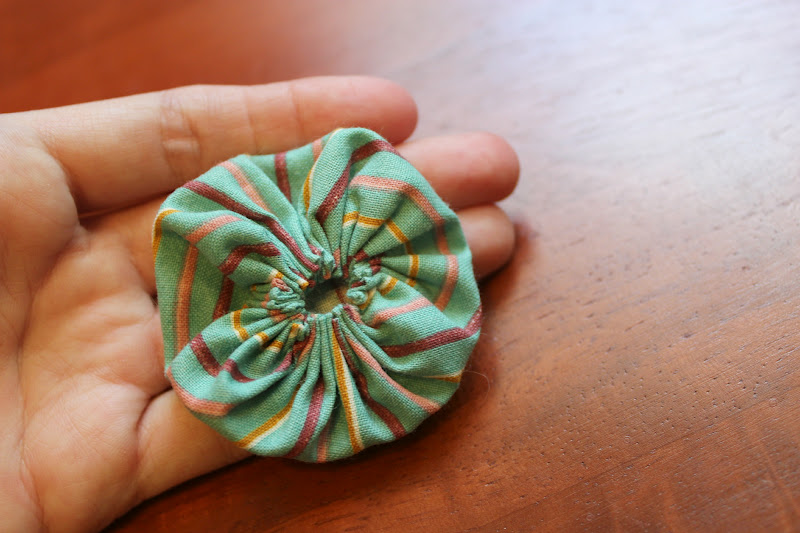
Tah-dah! You're all done with this little guy. Wasn't that a piece of cake?
To attach to a headband, simply stitch each yo yo on to the lace, elastic, etc., being sure to hide your knots.

Hope you are all having a lovely weekend!