
DIY Fall Wreath

Last week, I started noticing that the daisy wreath on our front door was getting a bit too summery for September. Despite the 90 degree weather, we're ready for fall, y'all! I whipped together this wreath and am pretty pleased with how it turned out, especially for the amount of time and money spent. Here's how to make your very own burlap wreath in less than twenty minutes!
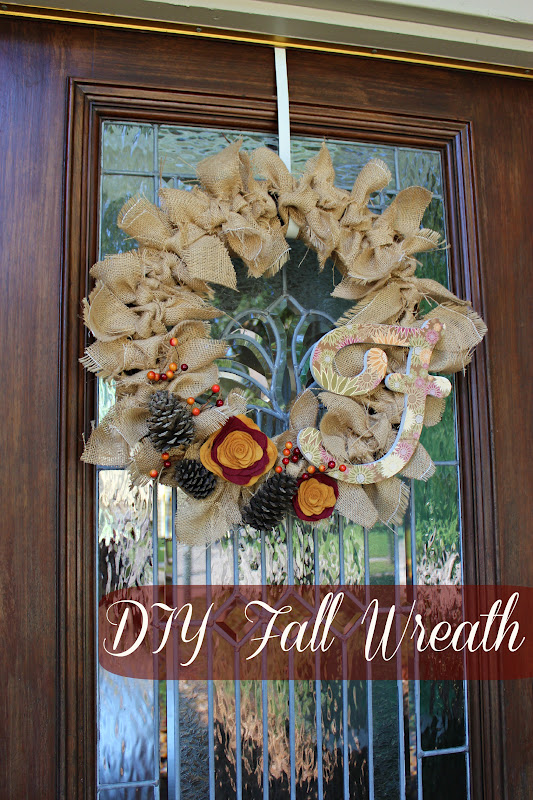
This letter 'F' came from Jo-Ann's (marked down to $2.99) and the fall scrapbook paper was .59. Simply trace the scrapbook paper around the letter and mod podge it on the front. (please note fall snack: candy corn and peanuts...YUM)

The next step was to take burlap (I used about 1 1/2 yards at $2.99 a yard) and cut it into approx. 18 inch strips.

Tie the strips one by one around a wreath of your choice and knot them. I already had this wreath (they have them for $5 at Michael's!) and wanted a rustic look in case you could see through the burlap.

Once you've tied pieces all the way around the wreath, cut thinner strips and fill in any gaps.


Using fishing line, attach the letter and other chosen "flair" to the wreath. Simply wrap the line around each piece and knot it in the back. I chose to add pine cones (we have a ton just laying around our backyard), a few faux berries we had on hand, and some felt flowers I made here.

Ta da! You're all done! A quick, affordable project that adds the perfect touch of fall to your front door. If you kept track of the costs listed, this wreath was a whopping $8. Can't beat that!


Come visit us soon, won't you? :)
I promise there will be football on the tv and pumpkin bread in the oven.
I promise there will be football on the tv and pumpkin bread in the oven.