faux calligraphy in 3 easy steps
Calligraphy has long been an interest of mine, and I put on my 2016 bucket list that I was going to master the art. It seems, however, that I like to take shortcuts in life because I've happily settled for what is known as "faux calligraphy". I recently spoke with Dionne of Nib and Pixel who spilled that there's really not much of a difference between traditional calligraphy and what we call "faux". Not in the modern sense, anyway.
Calligraphy is the perfect way to address invitations, write on place cards, and everything in between. I always get questions about what method I use and you won't believe how simple it is; grab a pen and I'll show you how it's done (and you'll definitely be better than me in no time).

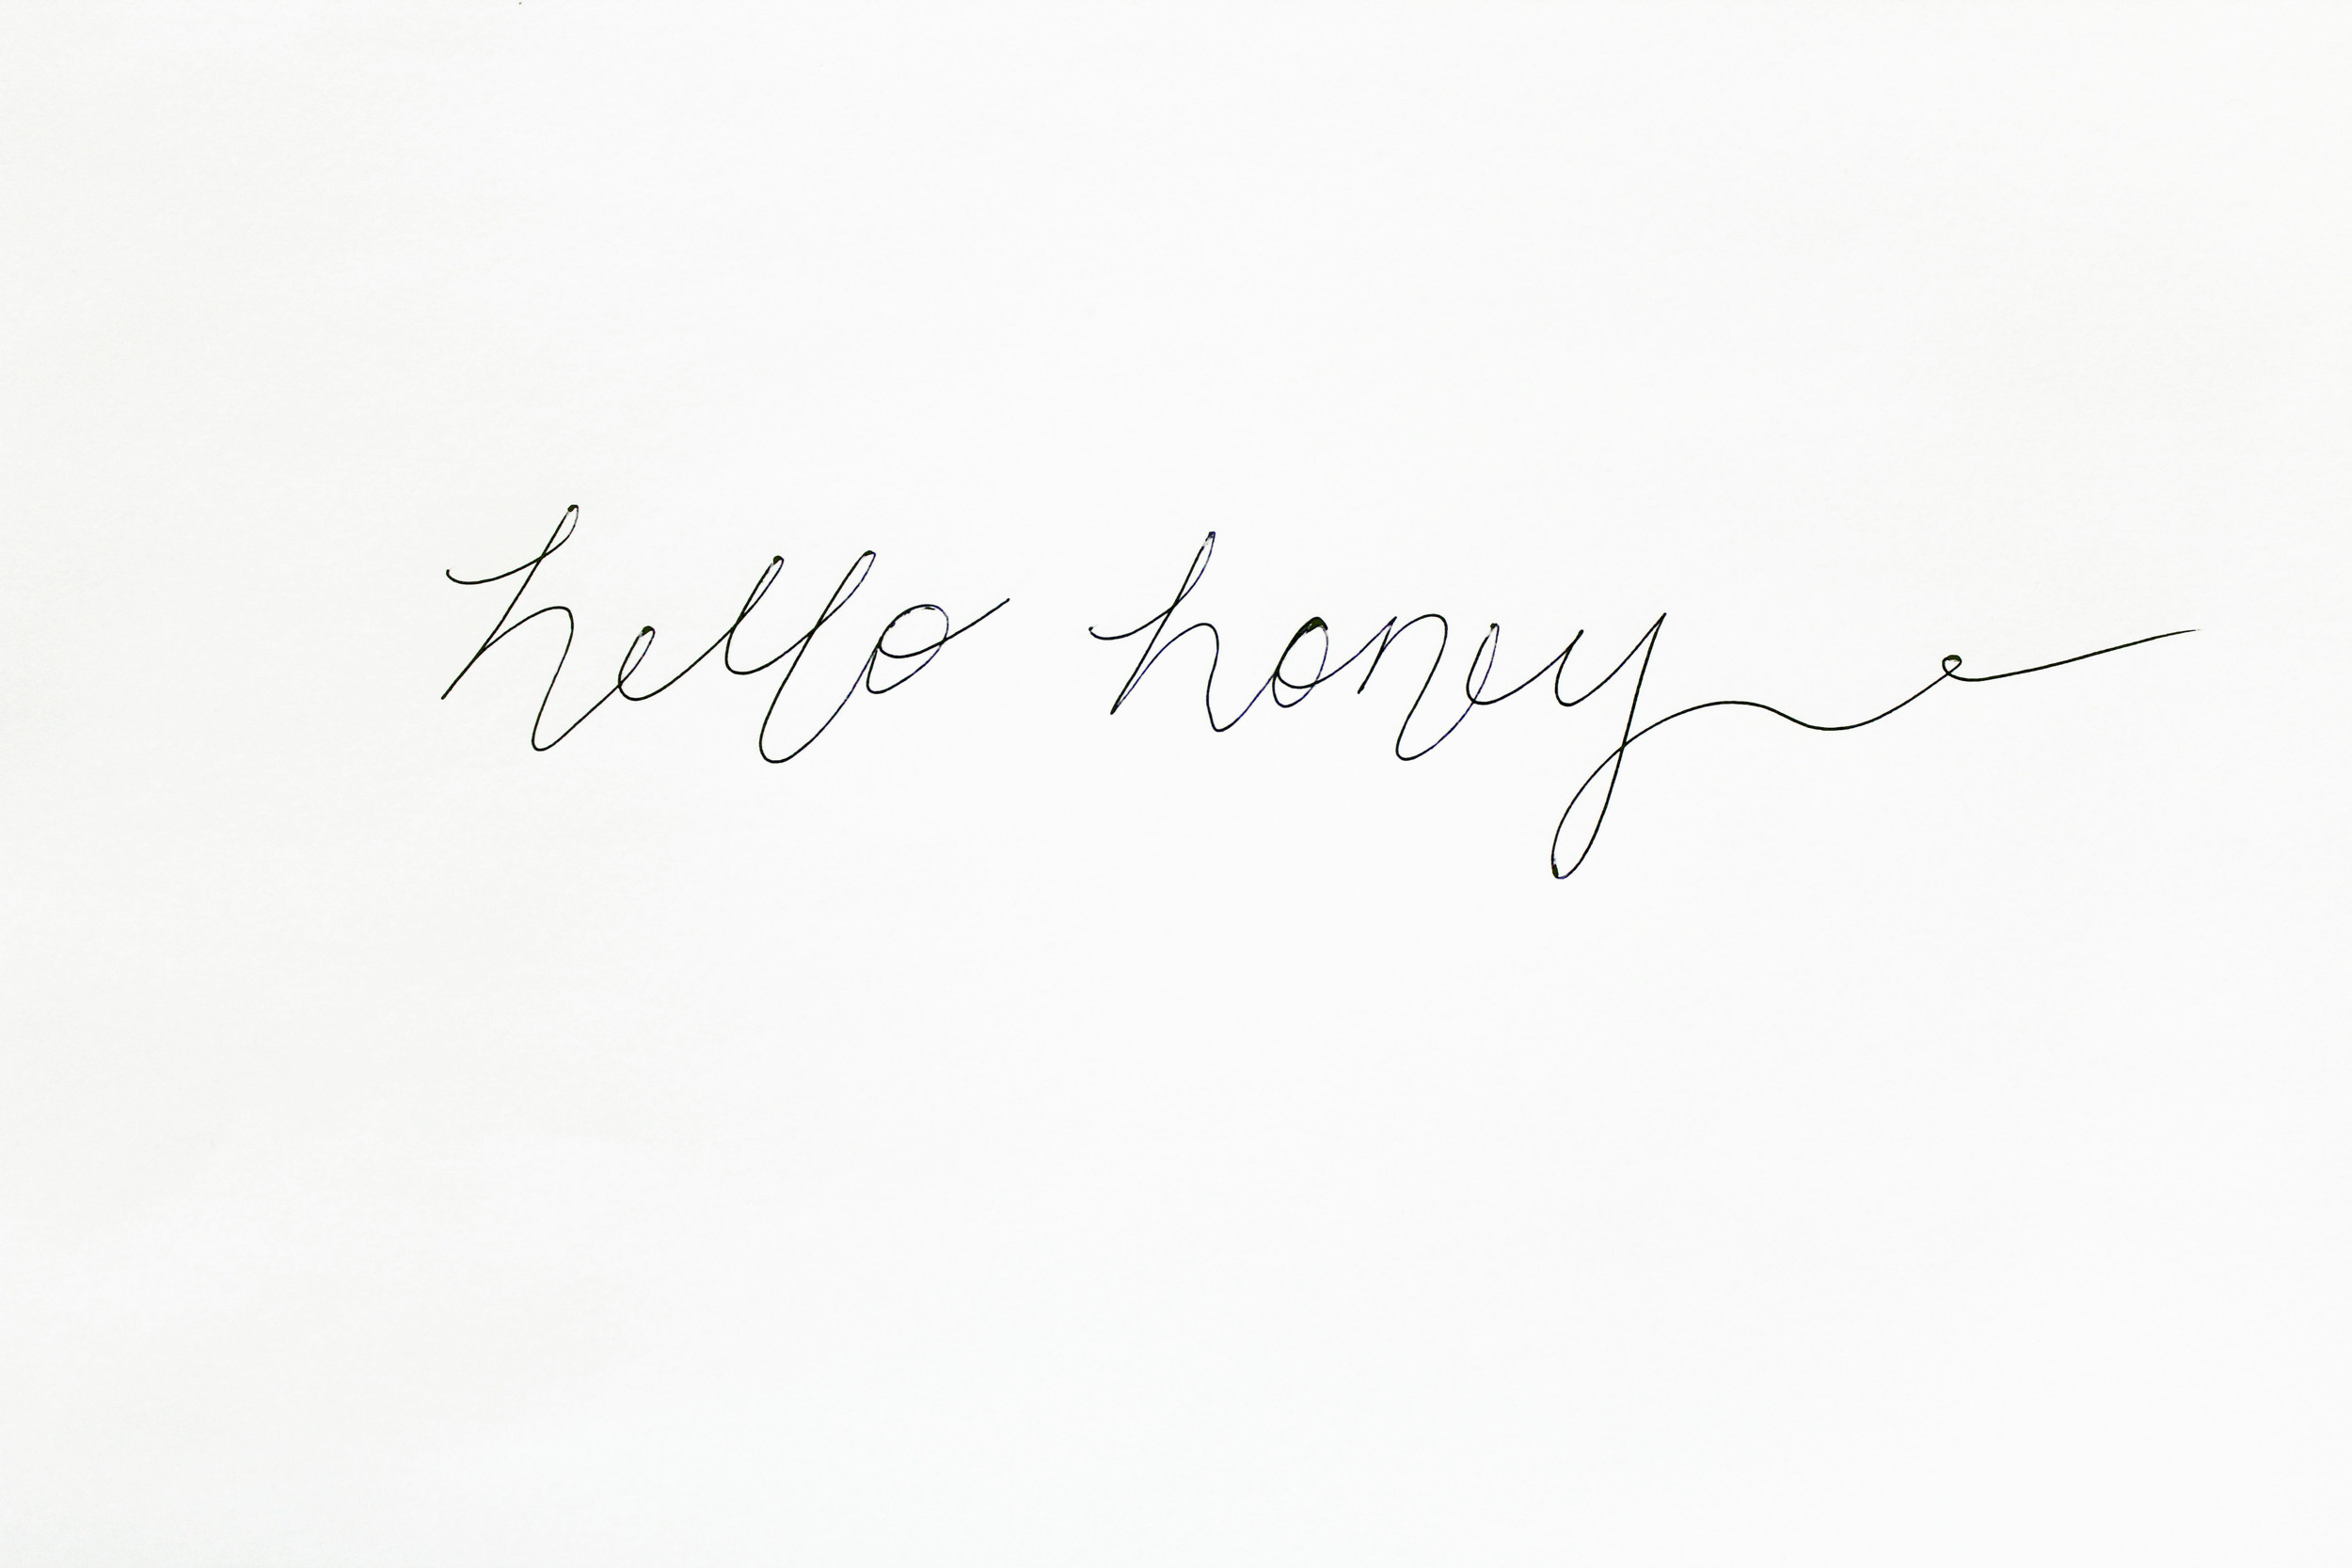
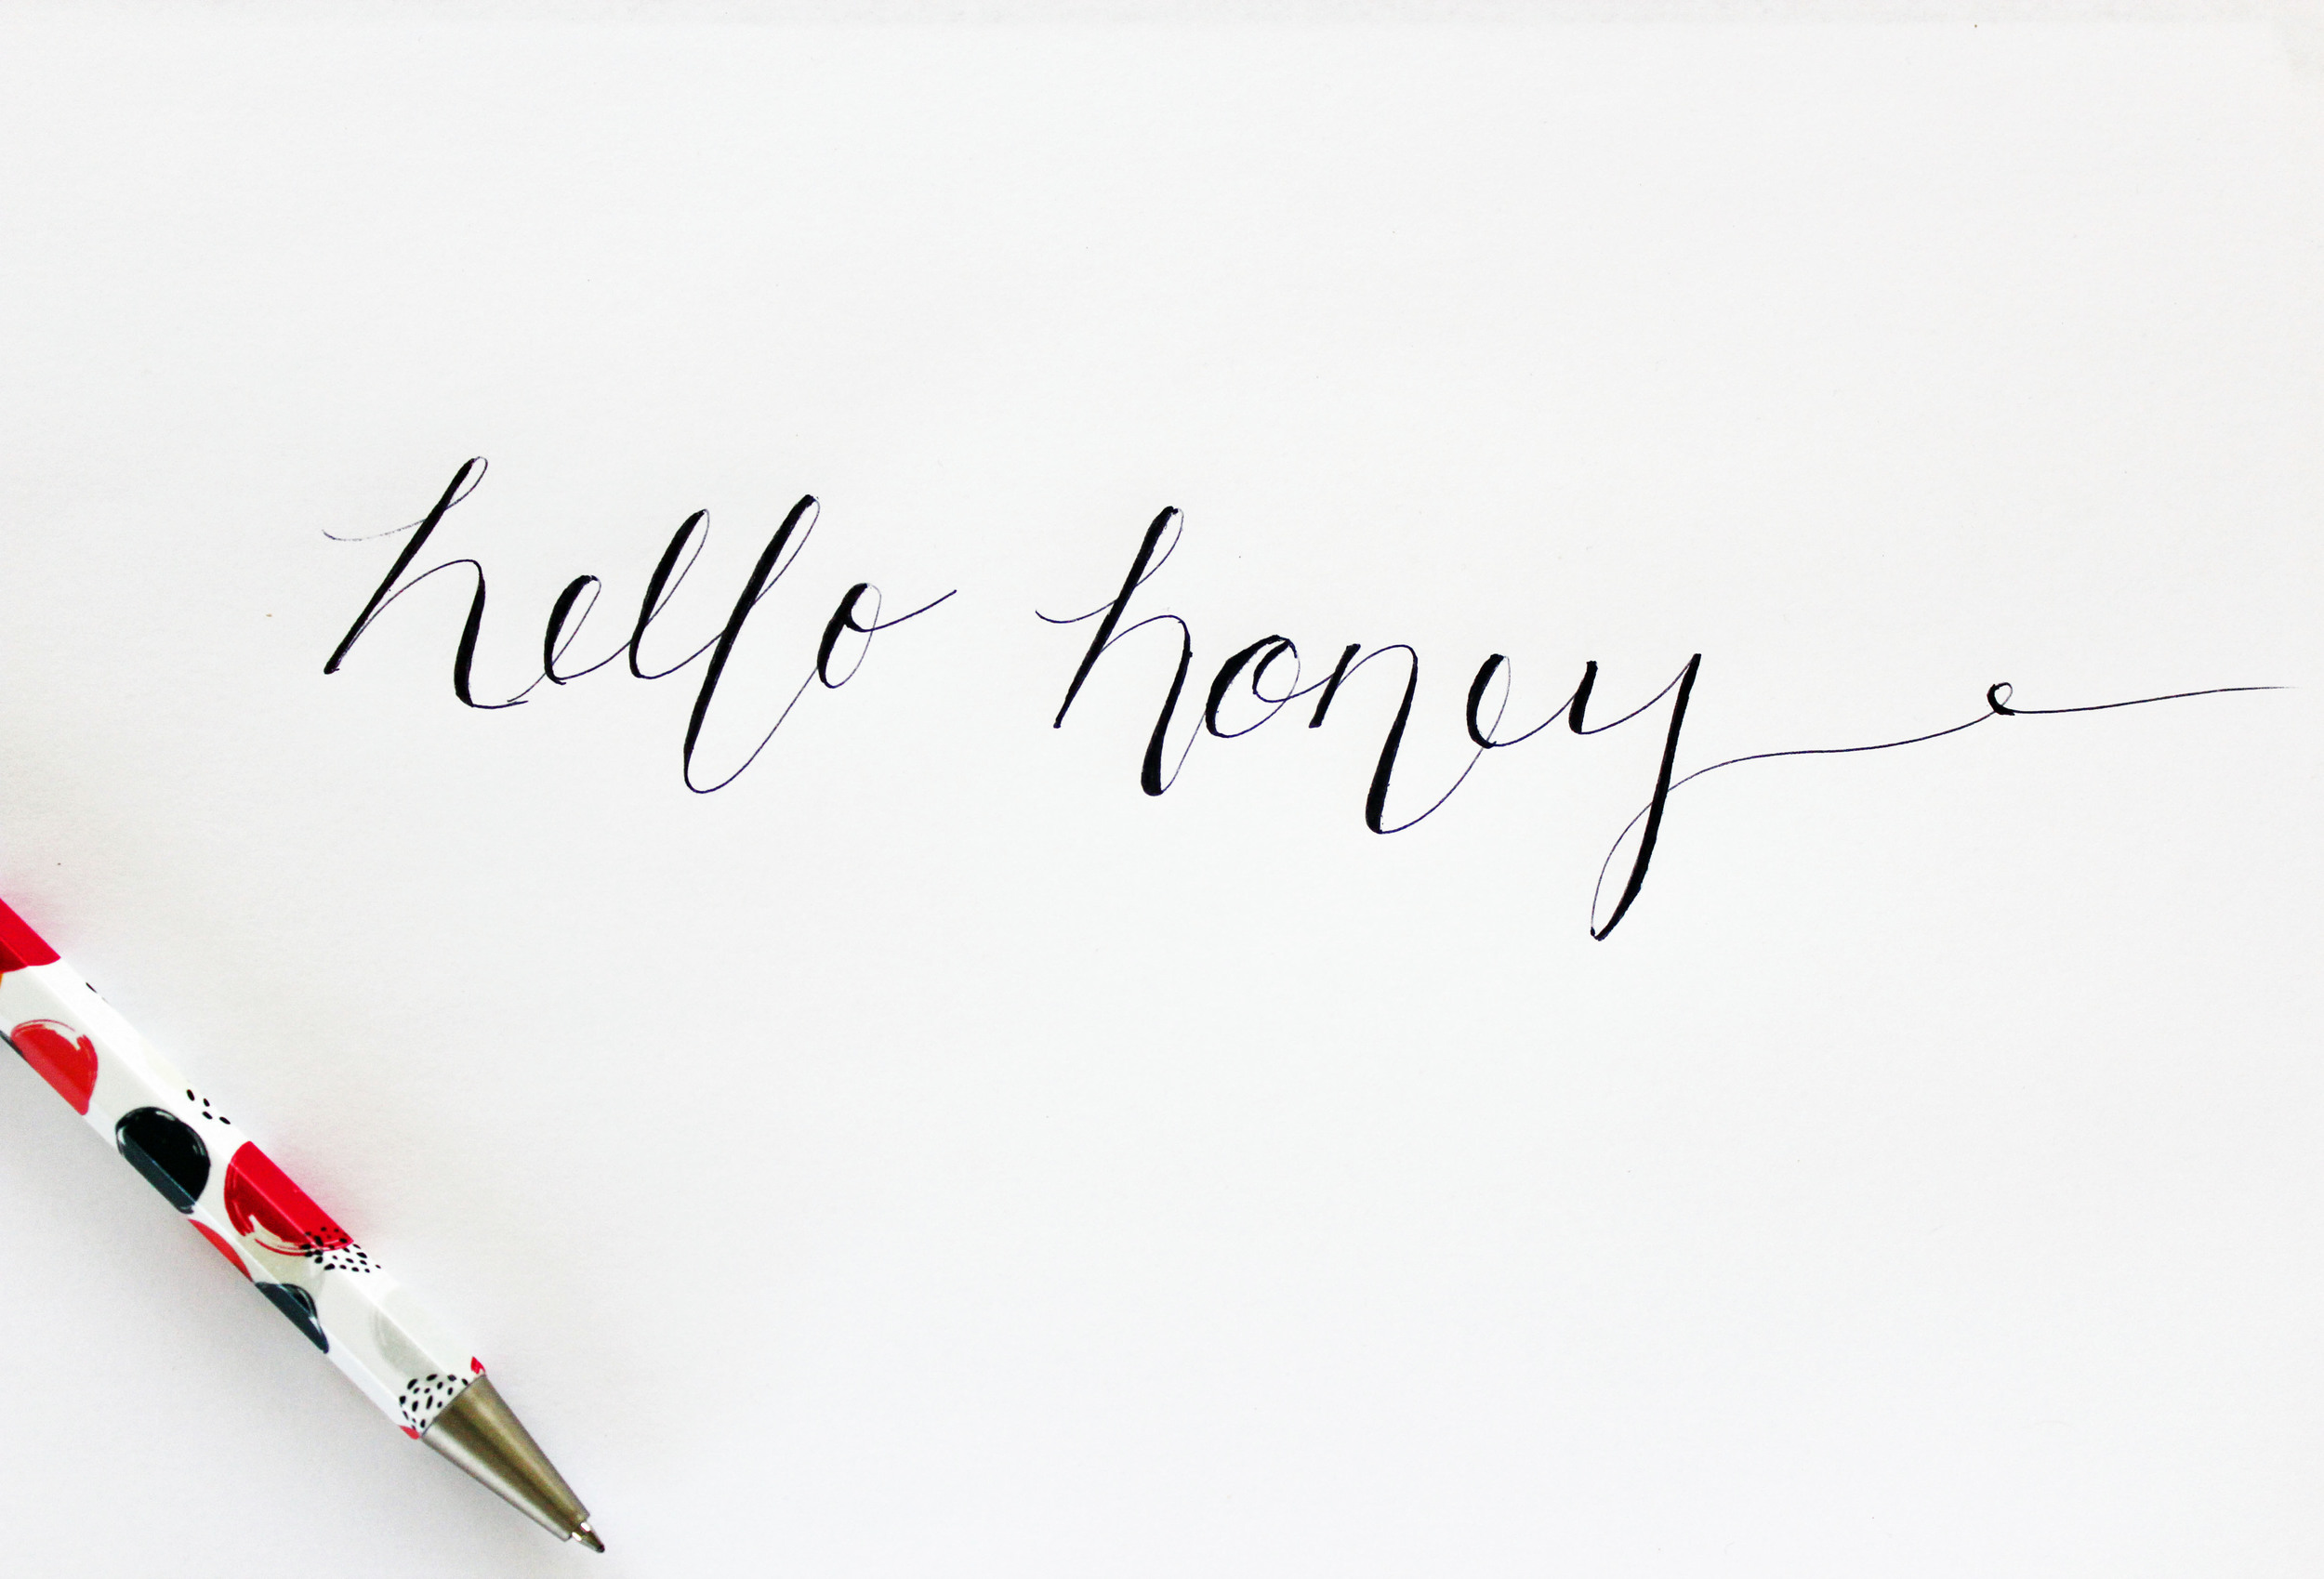
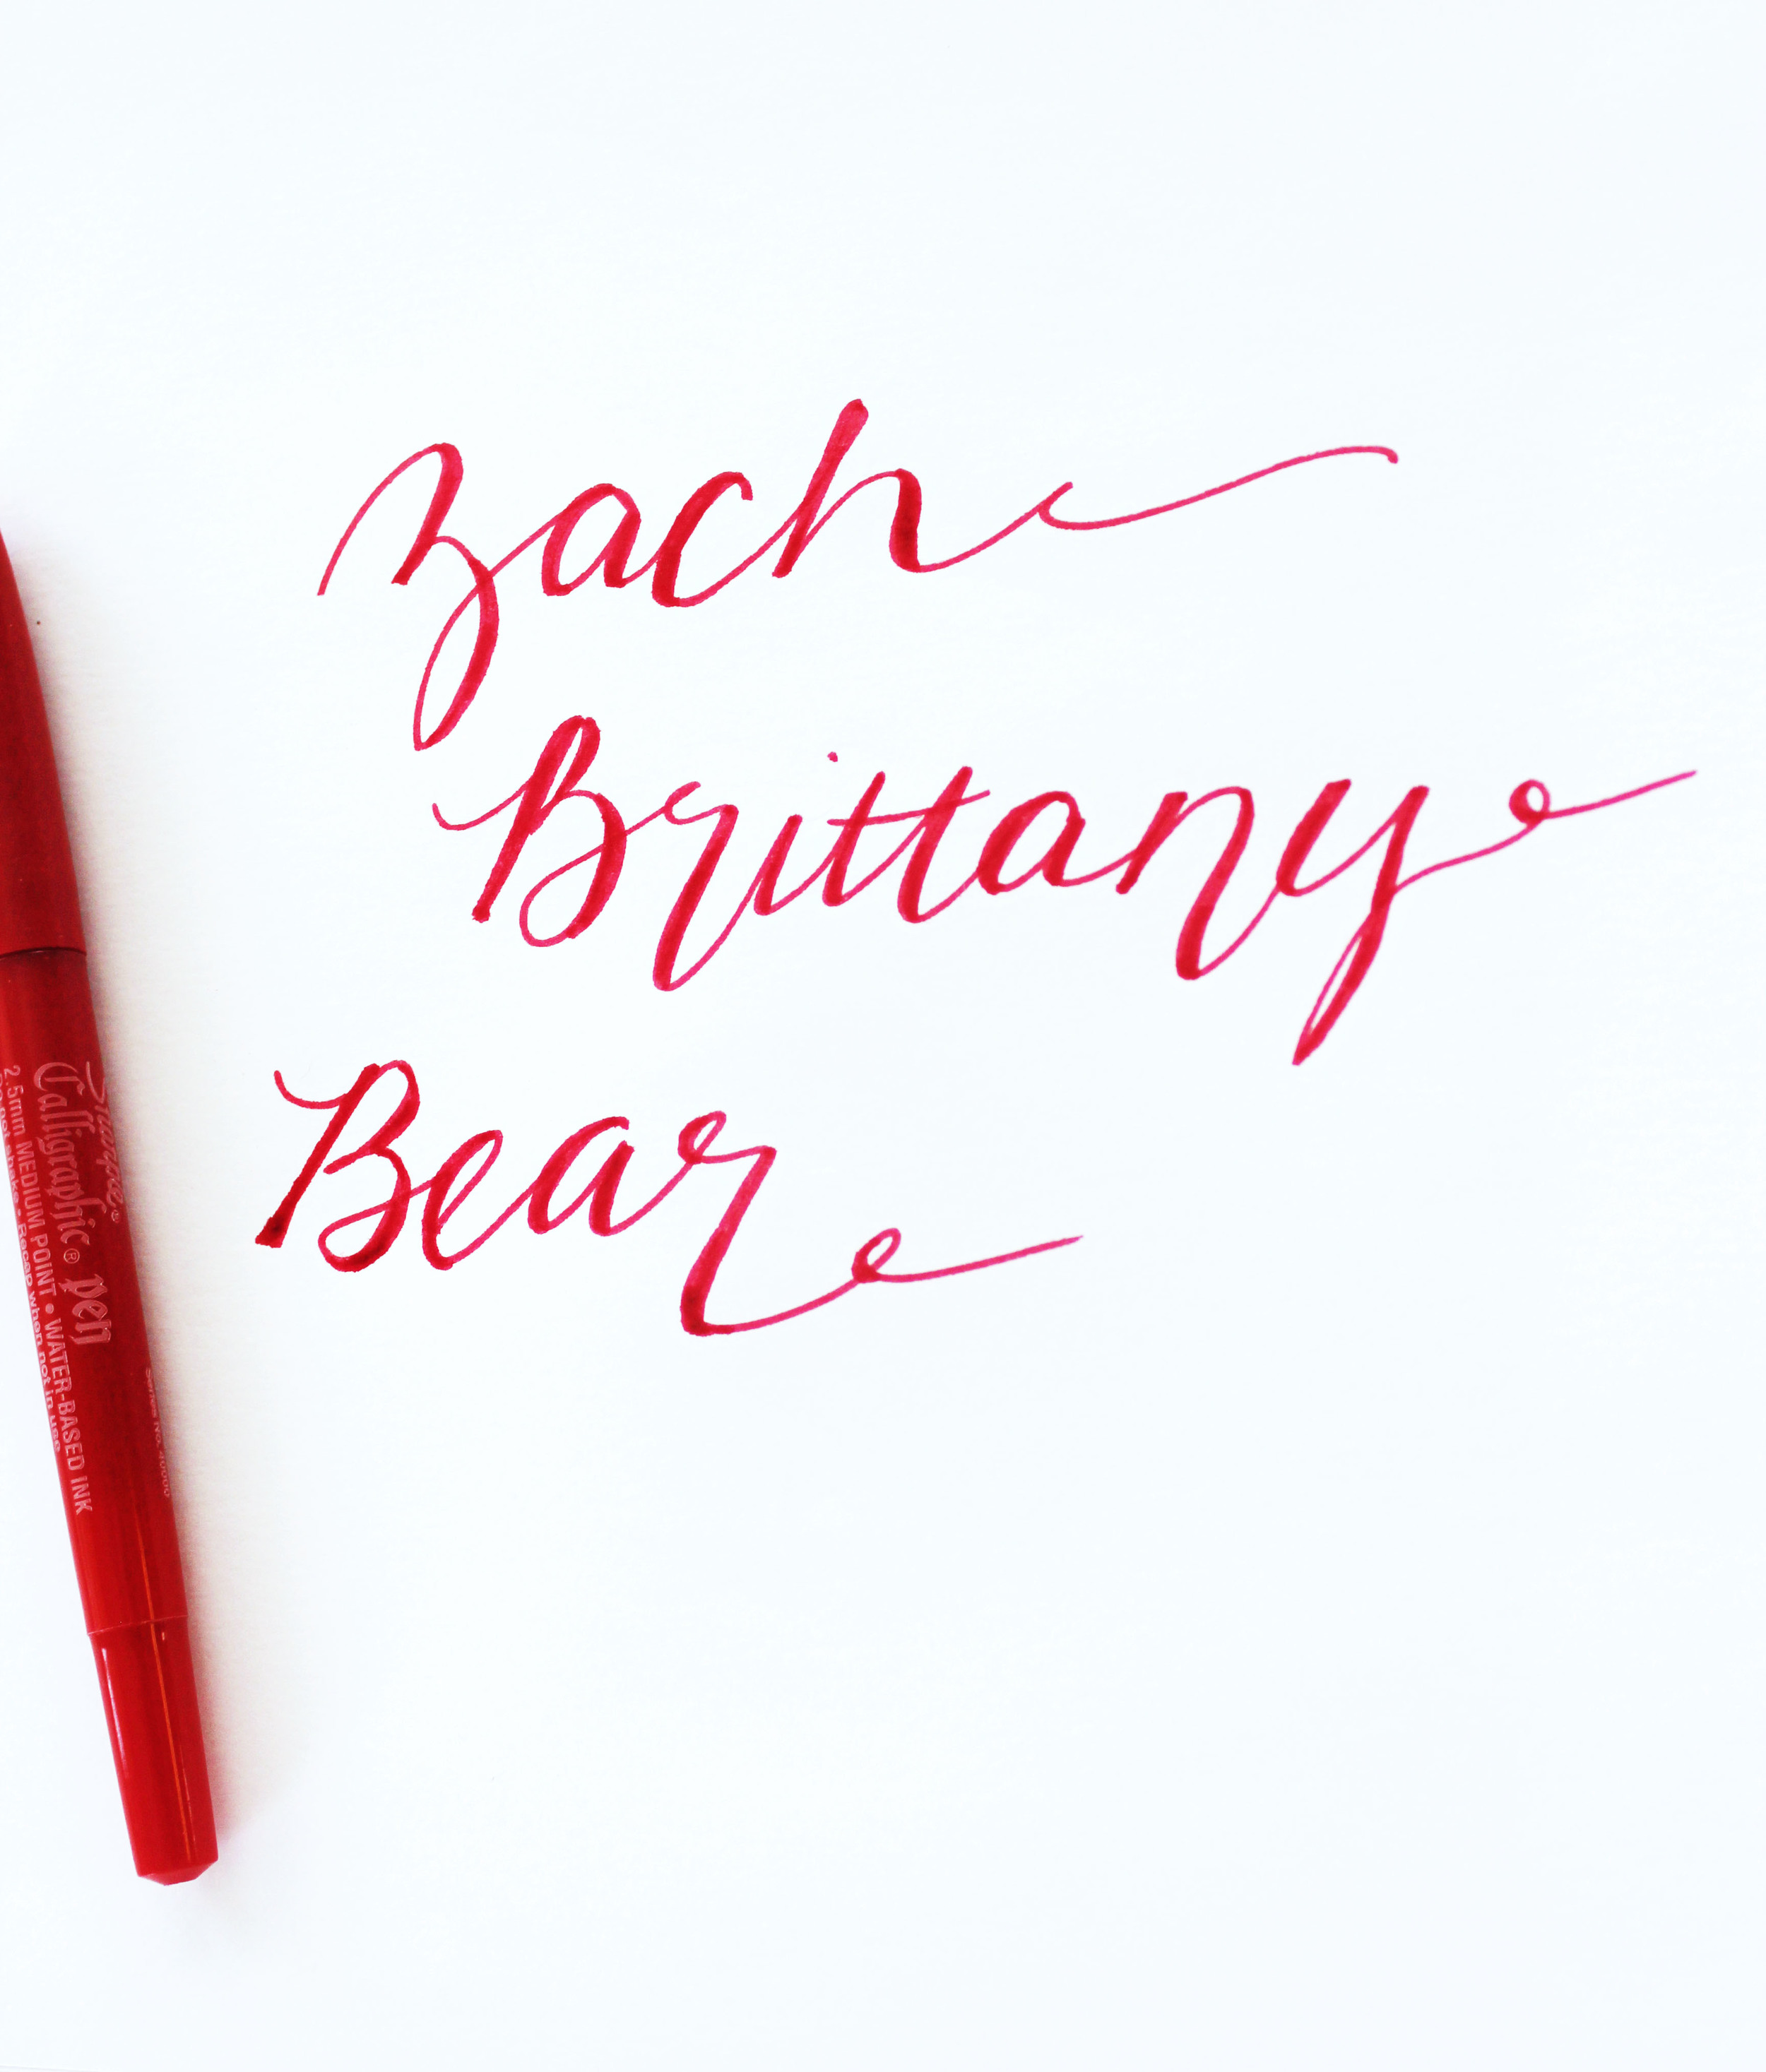
STEP ONE: Using a regular ballpoint pen, write whatever name or group of words you want to calligraphy in cursive. There's no right or wrong method to this, just however it comes naturally for you. I like to elongate some of the letters more than others for a modern look. It also looks pretty to trail on and off of the page (I only did off here).
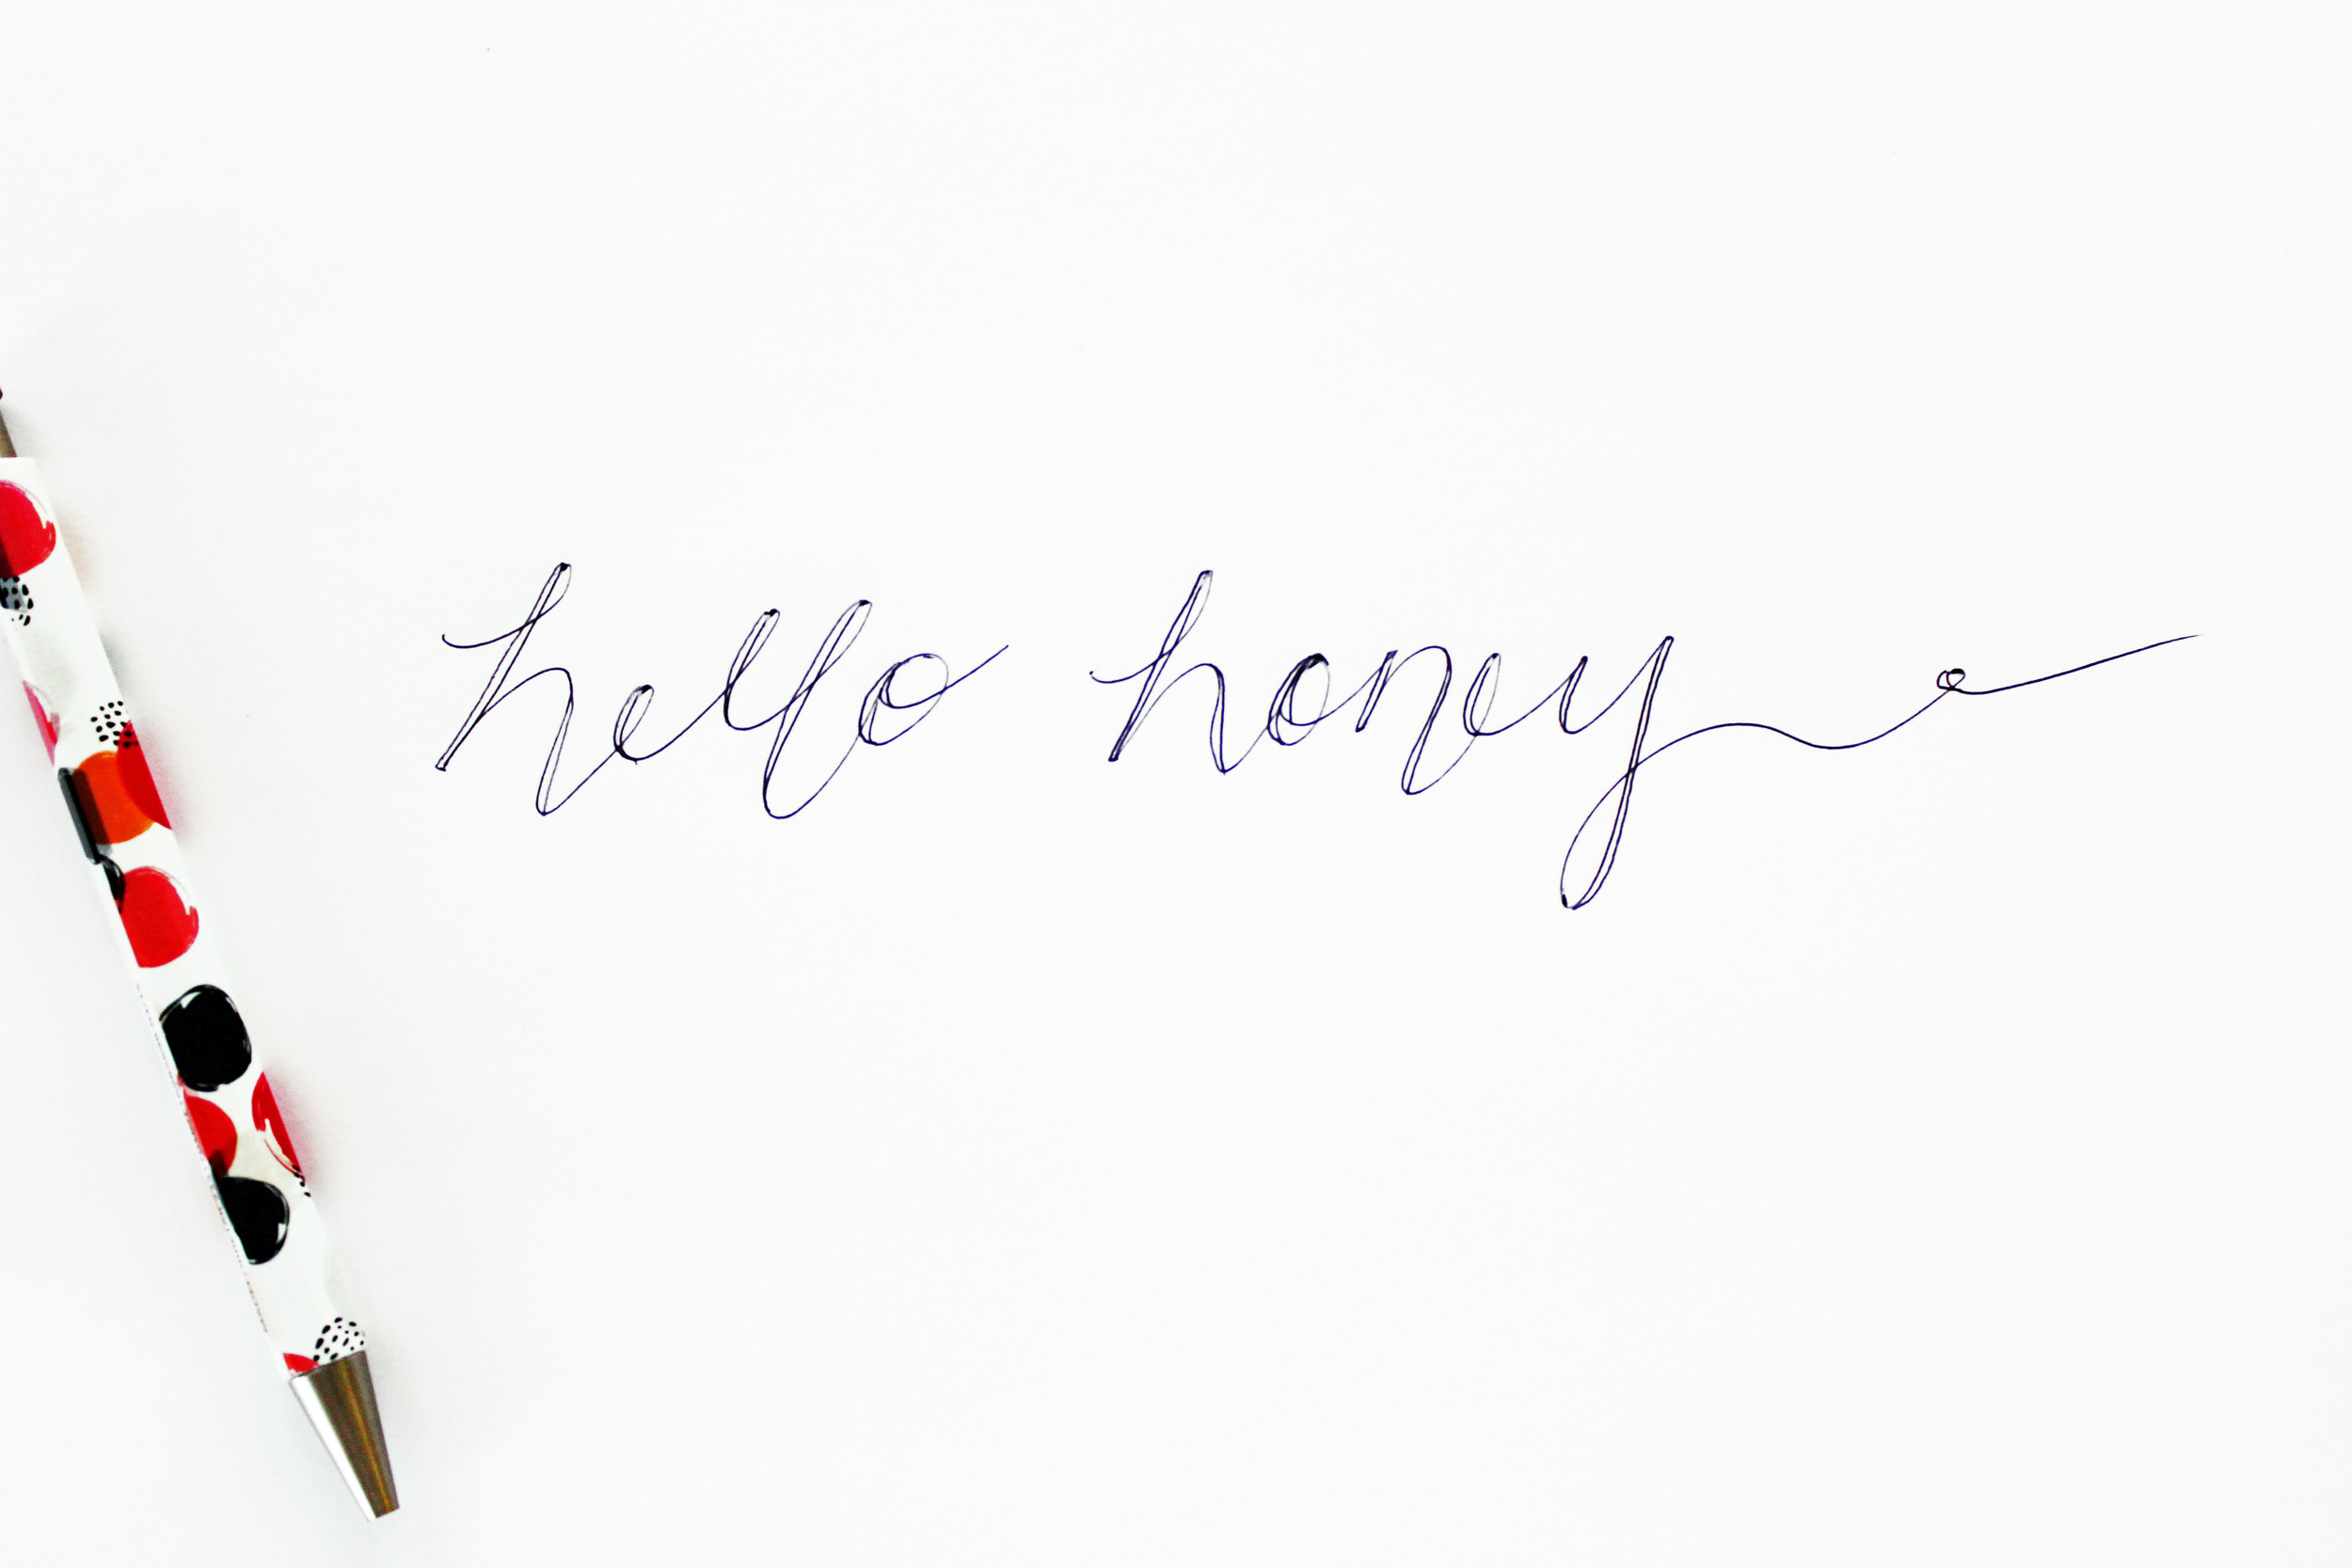
STEP TWO: Look at how you wrote the letters and take note of when your hand went in a downward motion with the pen. You'll need to draw lines to denote downstrokes; a downstroke occurs when your hand moves downward to create part of a letter. With the "h", for example, that first edge on the left is a downstroke, then you swoop up and to the right and down again for the right leg of the "h". Use this same method on each letter.
STEP THREE: Now comes the fun part, coloring! Everyone loves to color; I mean, they are selling those adult coloring books like hotcakes right now.
Fill in the spaces you just created with the downward lines.
It should look like this when you're done. And that's it! You mastered the art of cheating. Just kidding. But really, you now know a method of calligraphy that is easy and fun, and your friends won't believe that you didn't sit through hours of expensive lessons.
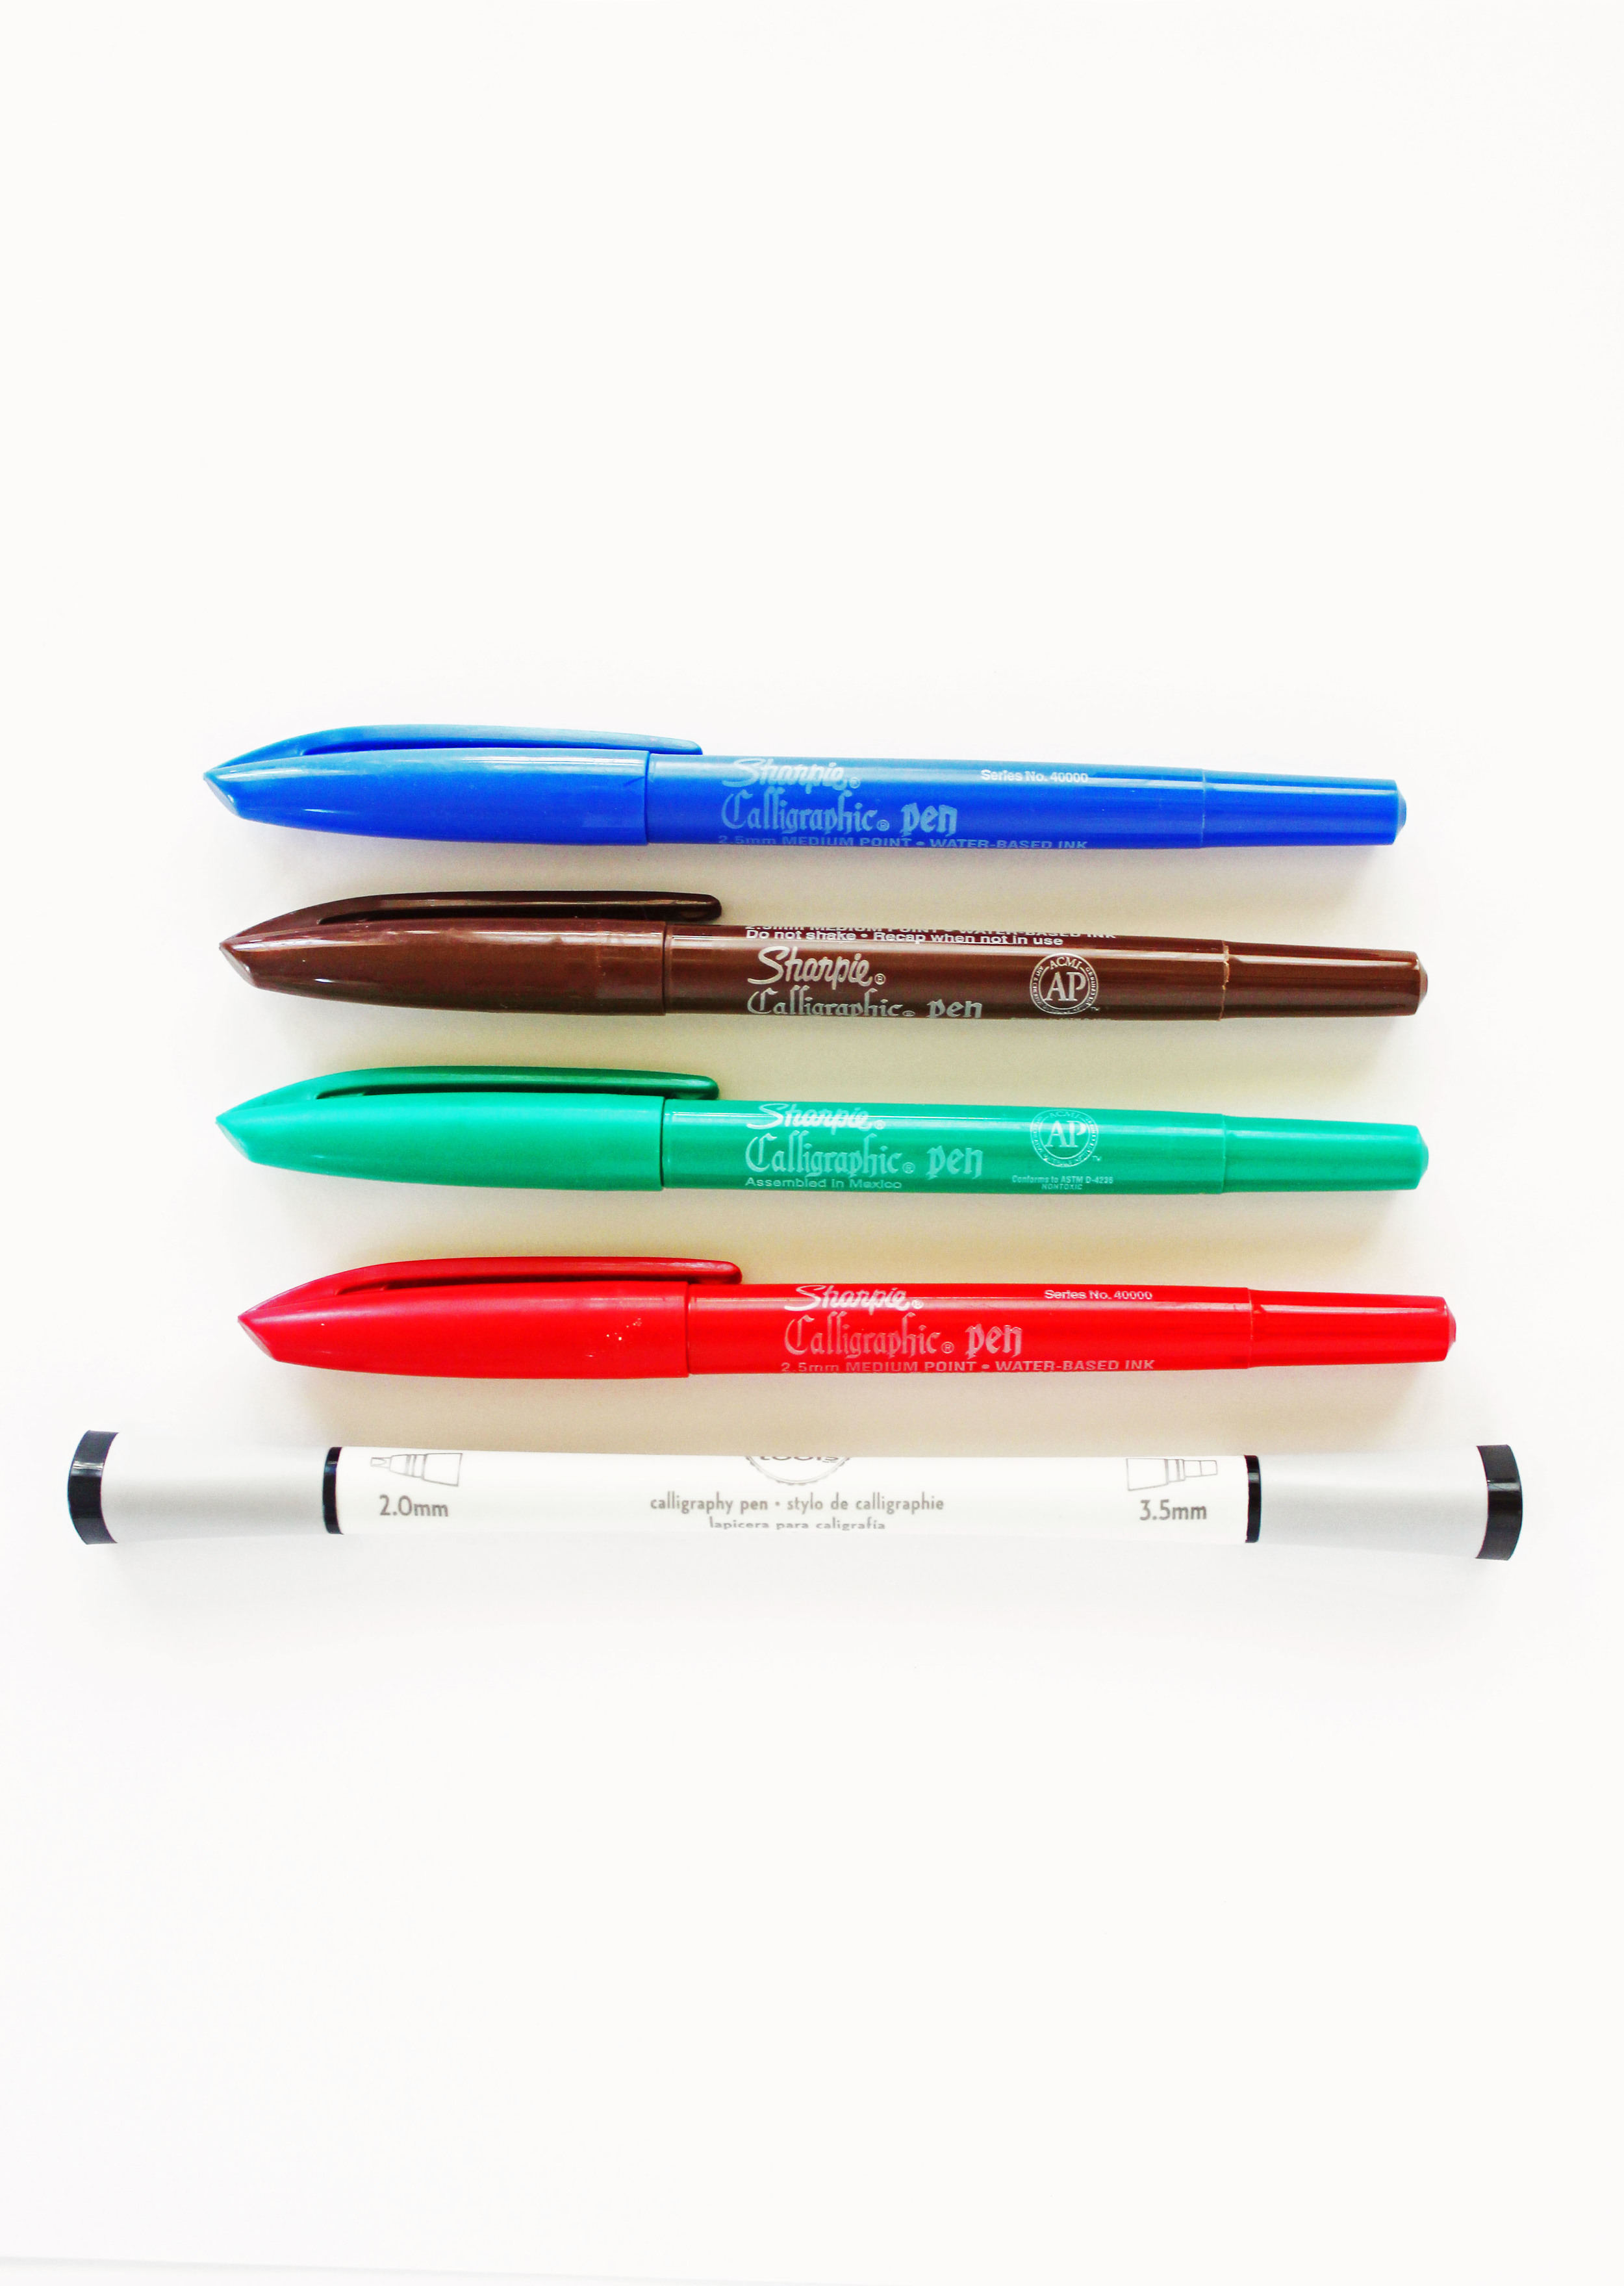
If you want a thicker look or don't like using a regular pen, the Sharpie Calligraphic Pens are a great tool for beginners and this method works well with them, too. Plus they come in fun, bright colors.
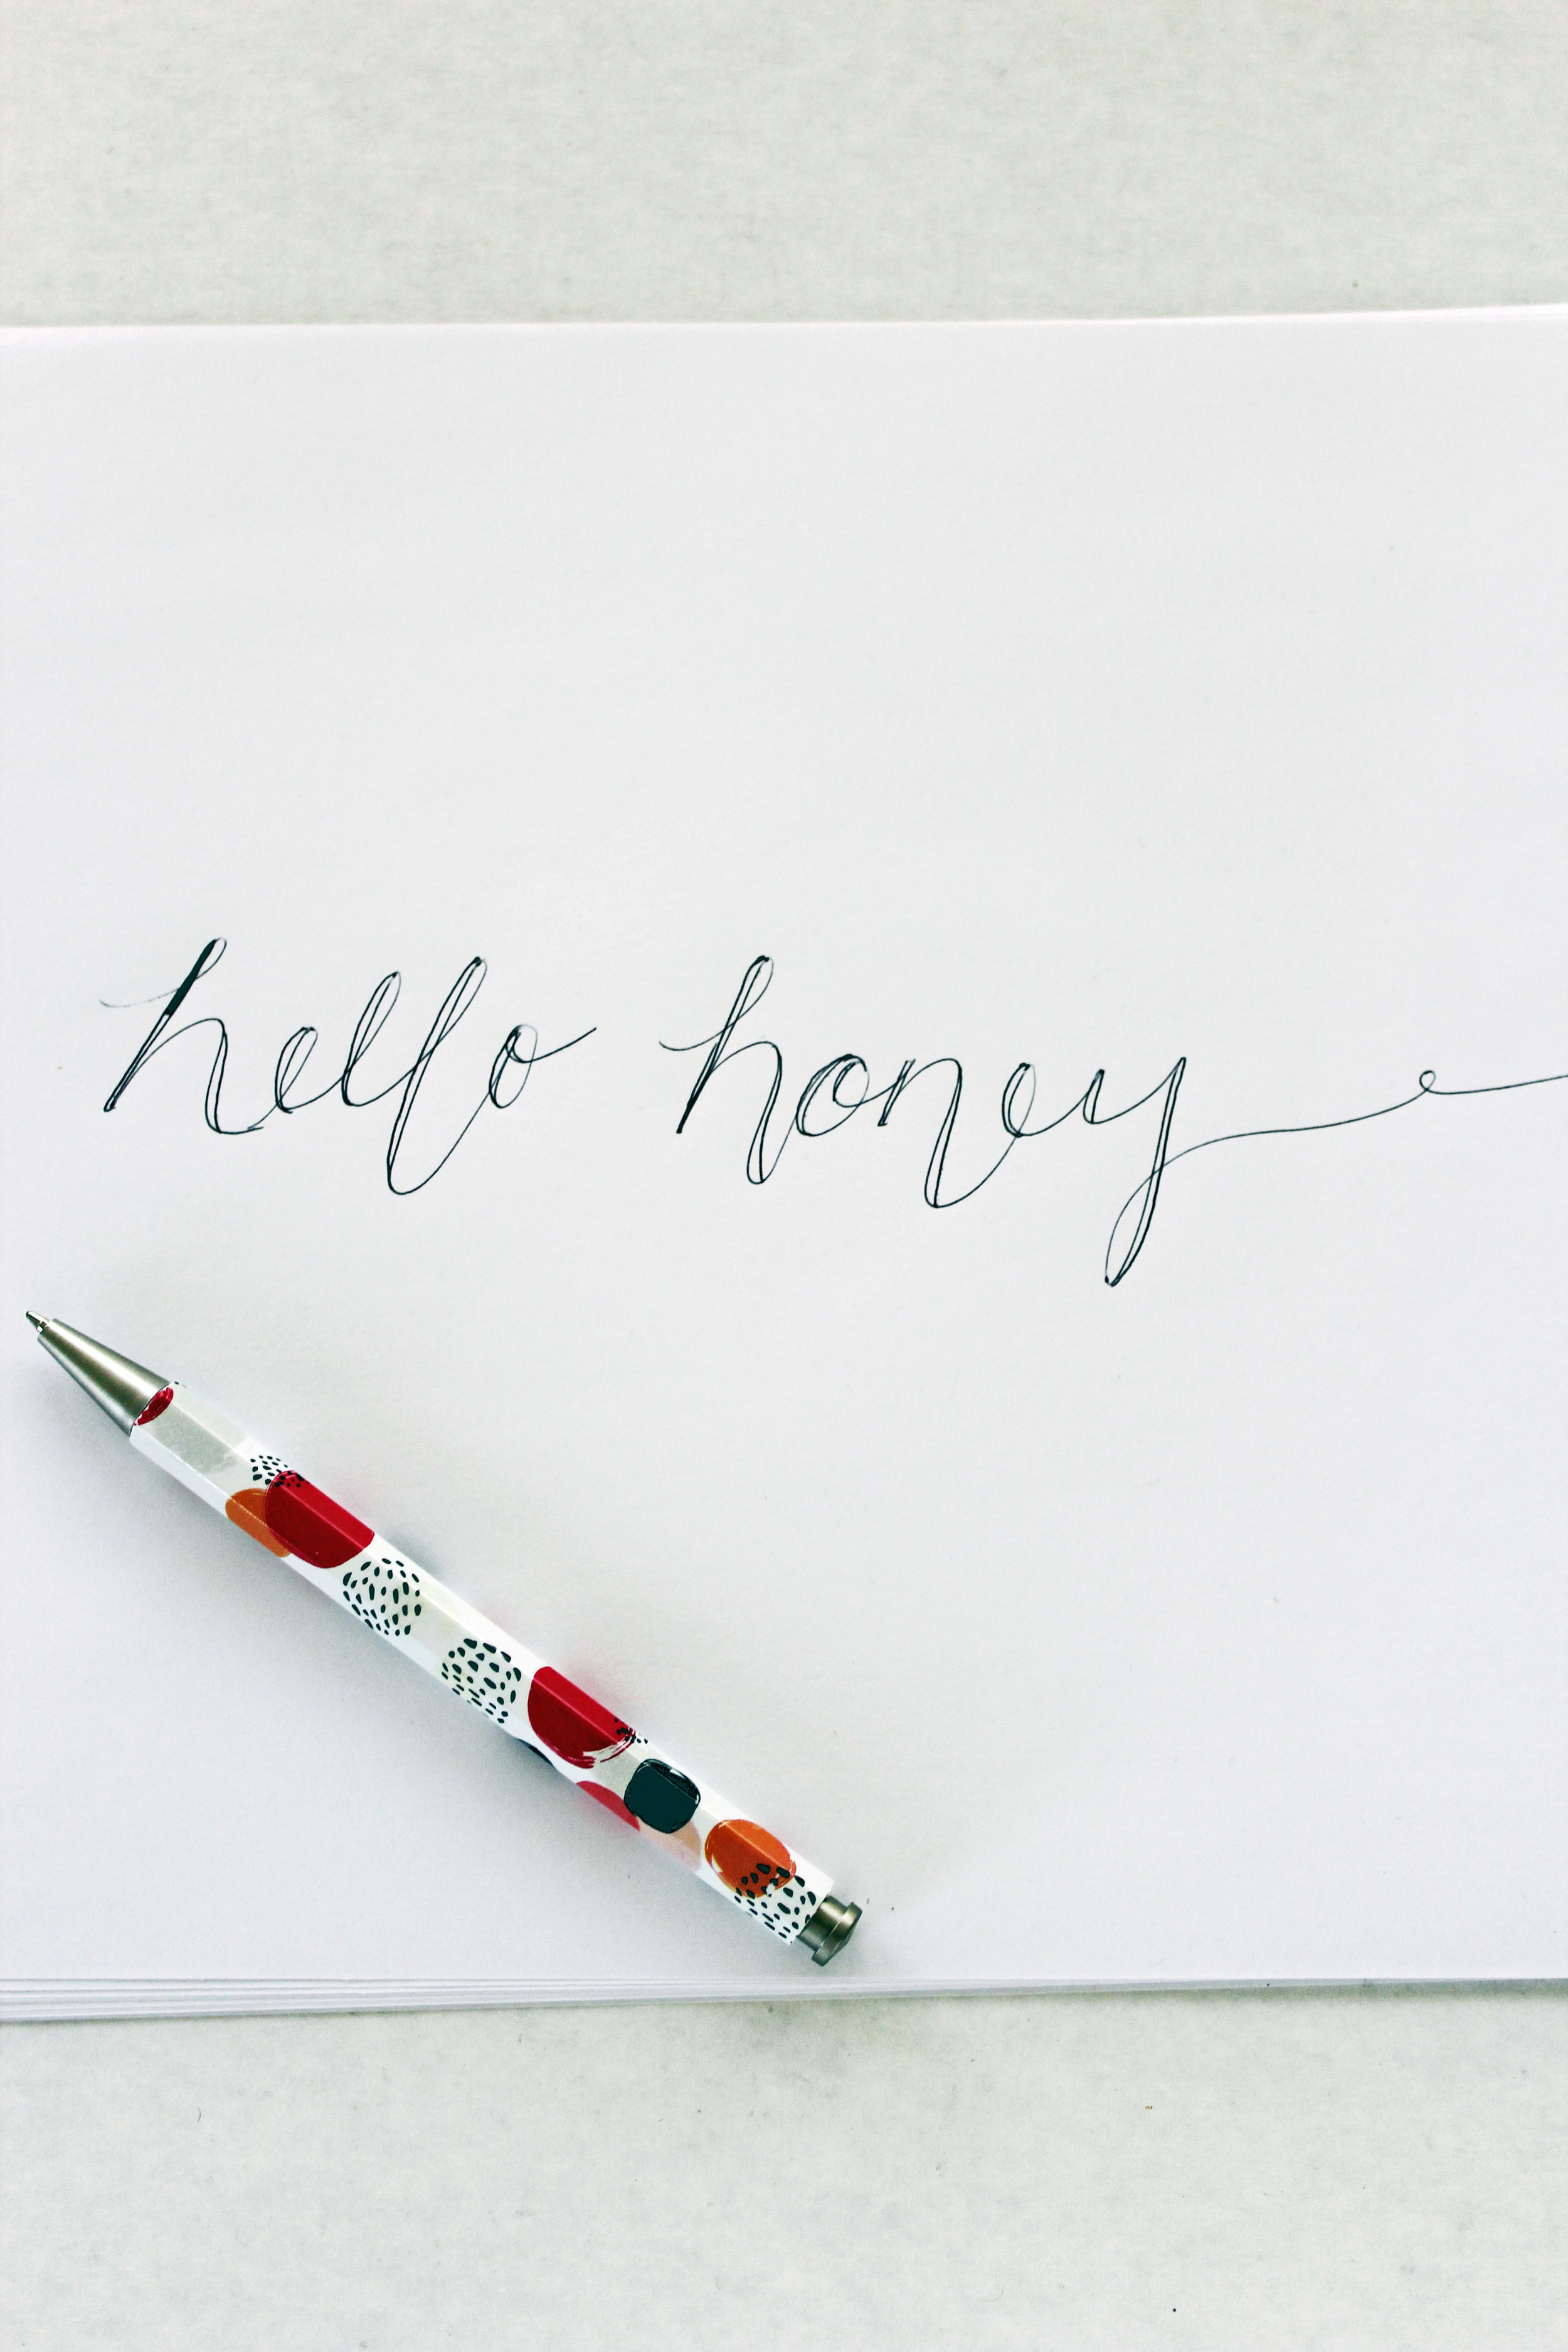
Order the Sharpie set here. I also use the double sided calligraphic pen pictured on bottom; I found it at Hobby Lobby and prefer using the 2.0 (smaller) side when I am writing on a larger surface like poster board.
If you're worried about your cursive, I promise you don't have to have the best handwriting to master this form of calligraphy. Play around with it and you'll find what looks best with your handwriting style. And if you become a pro and want to email me a picture of your writing at thehellohoneyblog@gmail.com, I would LOVE that! Just knowing someone besides my Mom read this post would be awesome. But knowing you actually took something from it? That would make my day.

If you have any questions, leave them in the comments and I'm happy to answer as best I can! So glad you stopped by!
xo, Britt